
I purchased this new 6 x 12 trailer from Bulldog Trailers in Chehalis to haul my quad and gear when I travel with my camper. Great family owned business to deal with!
So far I’ve got the interior painted, the floor glued down, trim finished, and the Etrack bolted down. I also built a small light box to power the led lights I mounted on the roof. I’ve added a video and some pics below to show the progress. I still need to build out the front to hang my riding gear and also to carry other gear like gas cans, extra water and whatever else I won’t have room for in the camper. With the popup campers, space is very limited. Lots of room in the trailer, so it will work out nice.
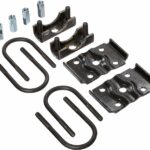 I’m also going to “flip the axle” on the trailer. What this kit does is remount the springs above the axle. The kit is pretty cheap ($79 at Amazon) and the install is pretty simple. It will require some minor welding however, so keep that in mind. Once installed, you’ll increase your ground clearance anywhere from 4″-6″ and you can mount bigger tires as well.
Here’s the link to the kit I purchased here: https://amzn.to/45ATCWi
To view the pics, click on one to enlarge it, then scroll through the images with the small arrows on each side. Enjoy!


The Light Box:

Average Rating